

How your team gets access
Access to your installation grows from a single starting point:- The Grand Central team sets up the first Admin for your installation. This one-time step is the only invitation that Grand Central handles.
- After that, your admins invite the rest of the team from the console. You don’t contact Grand Central to add more people.
To join an installation that’s already set up, ask an Admin on your team to invite you. An admin adds new members, not the Grand Central team.
Open team management
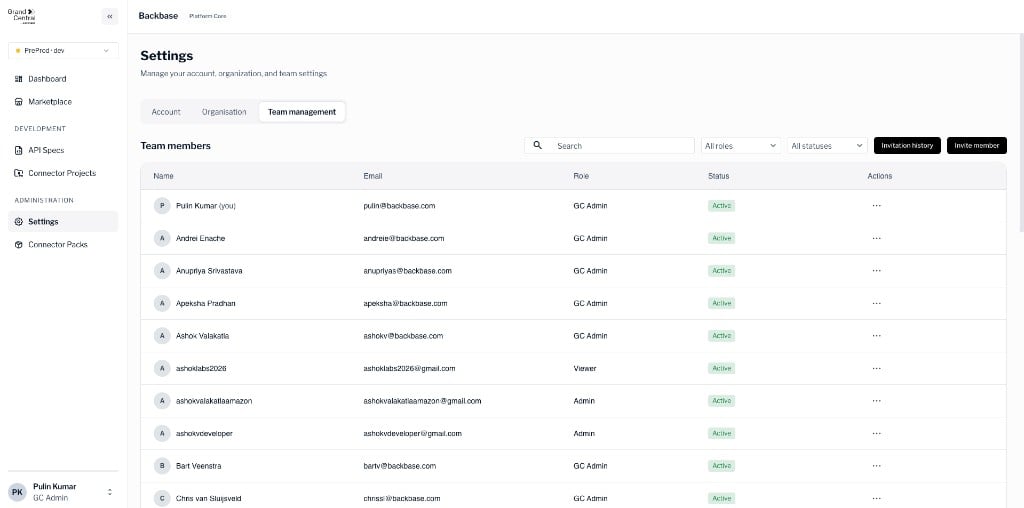
To manage your team, go to Settings and open the Team members tab. The tab lists everyone in your installation, along with their role and status. The member list shows the following columns:Roles
A role controls what a member can do. The following table describes the roles.Invite a member
To add someone to your installation, invite them by email. Members with the Admin role can send invitations.1
Open Team members
Go to Settings and open the Team members tab.
2
Start an invitation
Select Invite member.
3
Enter details
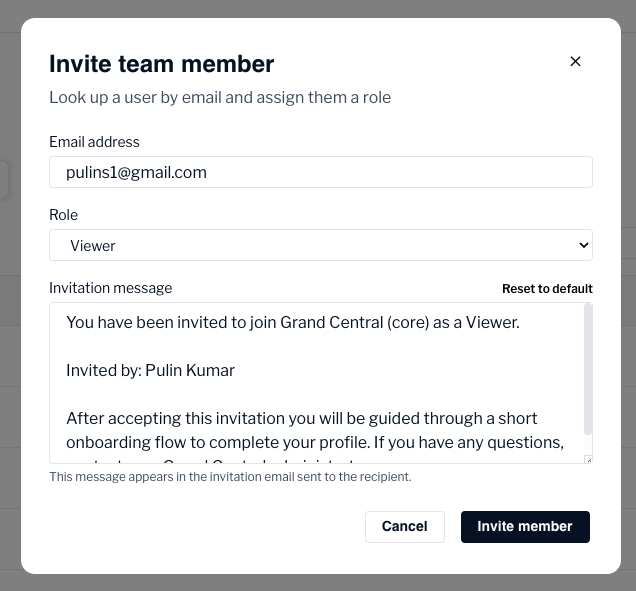
Enter the person’s email address, choose a role, and add an optional message.
4
Send the invitation
Send the invitation. What happens next depends on whether the person already has an active Grand Central account.
- If the person already has an active Grand Central account, such as an internal user or a guest who accepted an earlier invitation, they’re added right away with the role you chose. No approval and no email are needed.
- If the person is new to Grand Central, or was invited before but hasn’t accepted yet, the invitation waits for a second admin to approve it. No email is sent until the invitation is approved.
You can’t approve your own invitation. A different admin must approve invitations for people who are new to Grand Central. This keeps a second person in the loop before access is granted.
Approve or reject a pending invitation
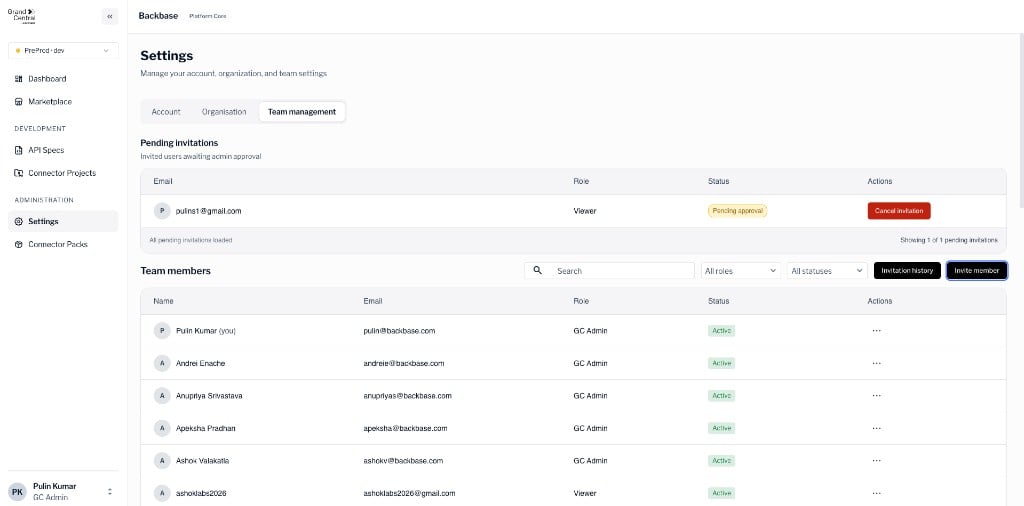
Invitations that are waiting for approval appear in the Pending invitations section of the Team members tab, with the status Pending approval. Any admin except the one who sent the invitation can act on it.- To approve an invitation, select Approve. Grand Central sends the invitation email and grants the role. The person then accepts the email and signs in.
- To decline an invitation, select Reject. No email is sent.
- To withdraw an invitation you sent yourself, select Cancel invitation.
Member statuses
A member’s status tells you where they are in the access process. The following table describes the statuses.Assign runtime access
Members see only the runtimes they’re assigned to. To give a member access to a specific environment, assign them to that runtime from the member’s actions. To remove access, unassign them from the runtime.Next steps
Back to the overview
Return to the Grand Central console overview.